
The short answer
To add text to speech to Cursor, create a token on Clonylab’s Connector screen and add a clonylab block with the address https://clonylab.com/mcp and an Authorization header to your mcp.json file. The Cursor agent then gets 14 voice tools. Keep your Clonylab tab open. It needs Pro or Team.
Key takeaways
- Add a clonylab block with url https://clonylab.com/mcp and an Authorization header to ~/.cursor/mcp.json.
- Cursor supports environment variables in headers, so the token does not have to sit in the file.
- The agent gets 14 tools. Cursor asks for approval by default before it runs one.
- The voice-over is made in your open Clonylab tab. Keep the tab open and the browser switch on.
- The AI connection is part of Pro and Team. It is English only, and the agent cannot create a cloned voice.
01What you get with Cursor text to speech
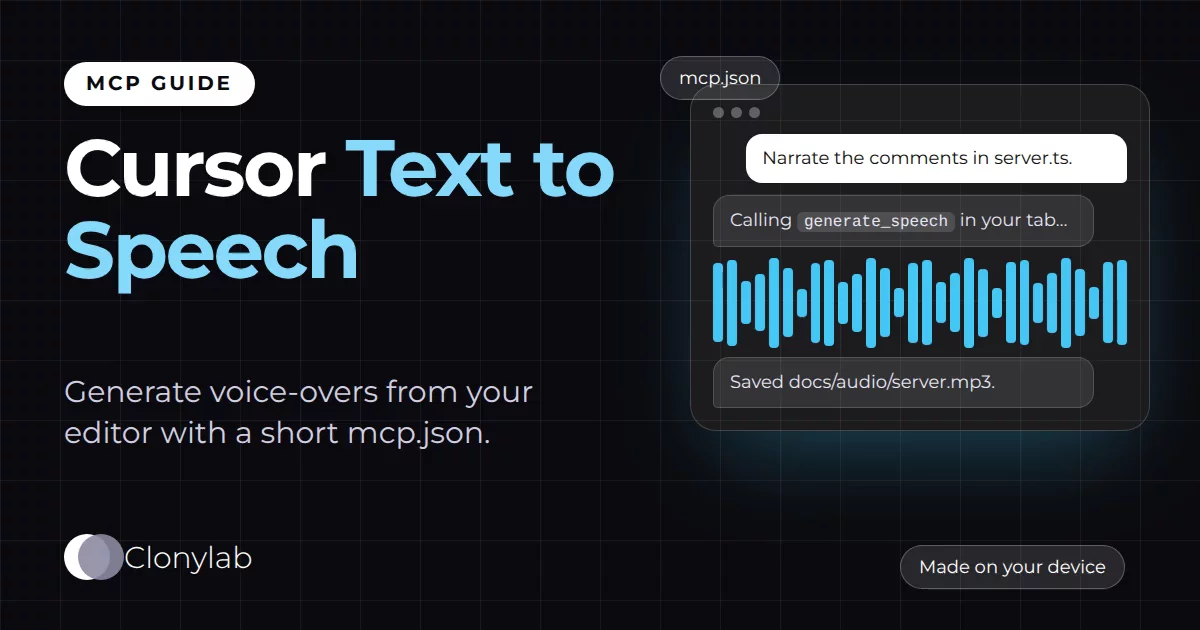
Cursor is an editor with an AI agent inside it. The agent already reads your code, edits files and runs commands. Add Clonylab as an MCP server and the same agent can also make voice-overs. You write a comment or a script, ask in the chat, and an MP3 lands in your project.
That is handy for more than you might think. Product demos need narration. Code walkthroughs are easier to follow when someone talks. Release notes can be read aloud for a team that prefers to listen. Once Cursor has the tools, all of that is one request away.
Clonylab gives the agent 14 tools for voices, speech jobs, History, Studio settings and usage. Our guide to the text to speech MCP server explains each tool. This page covers the Cursor part: the mcp.json file, the approval prompts and a few prompts that suit an editor.
02Before you start
| Need | Details |
|---|---|
| Cursor | Installed, with the agent chat available |
| A Clonylab plan | The AI connection is part of Pro and Team |
| A token | Made on the Connector screen. It starts with swr_ and is shown once |
| An open Clonylab tab | Voices are made in your browser tab, so keep it open |
Cursor reads its MCP servers from a file called mcp.json. There are two places for it. A file in your home folder, ~/.cursor/mcp.json, applies to every project. A file inside a project, .cursor/mcp.json, applies to that project only. For Clonylab we suggest the home folder, because your token should not sit in a project that other people can read.
03Add Clonylab to Cursor in 4 steps
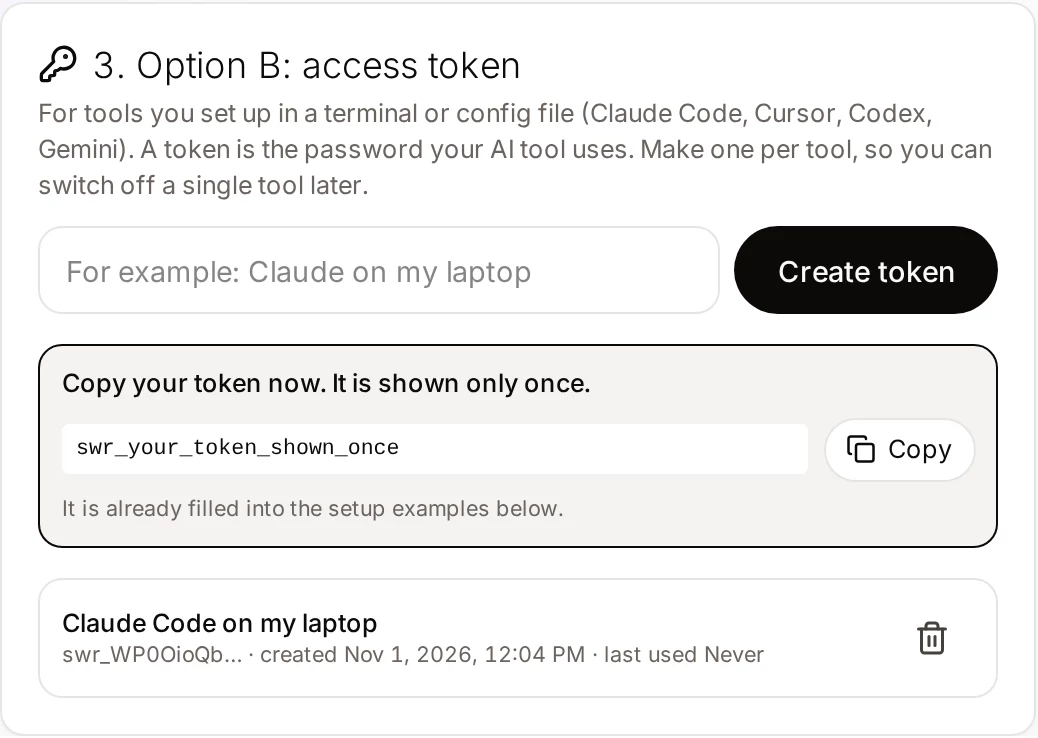
Create a token
Open Connector in your Clonylab account, name a token “Cursor on my laptop” and copy it.
Open your mcp.json
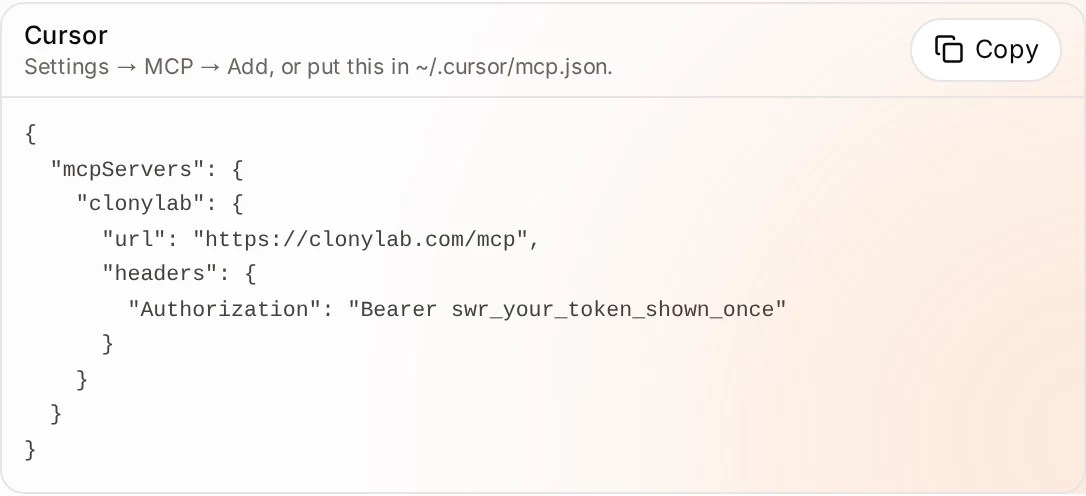
In Cursor, open the MCP settings. Cursor’s documentation describes a toggle list for your servers, and the Connector screen says Settings, then MCP, then Add. Either way you end at the same JSON. You can also create ~/.cursor/mcp.json yourself.
Paste the block
Add the Clonylab server inside mcpServers. If the file already lists other servers, put it next to them and keep the commas.
{
  "mcpServers": {
    "clonylab": {
      "url": "https://clonylab.com/mcp",
      "headers": {
        "Authorization": "Bearer YOUR_TOKEN"
      }
    }
  }
}
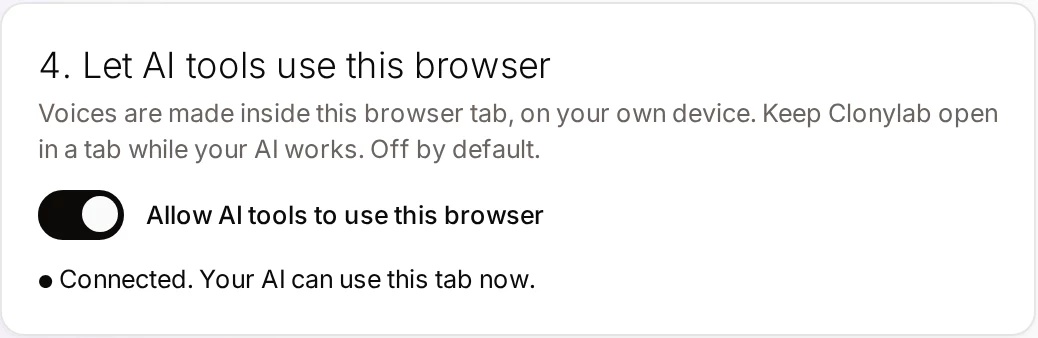
Allow your browser tab
Switch on Allow AI tools to use this browser in Clonylab and keep the tab open.
04Keep the token out of the file
Cursor’s documentation says the url and headers fields support config interpolation. In plain words, you can point at an environment variable instead of pasting the token. Set the variable once in your shell profile, then write this:
"headers": {
  "Authorization": "Bearer ${env:CLONYLAB_TOKEN}"
}
The token now lives in your shell settings, and the JSON can sit safely in a dotfiles repo. Start Cursor from a shell that has the variable, or set it where your system reads user variables, so Cursor can see it.
05Your first voice-over from Cursor
Open the agent chat. By default Cursor asks for approval before it runs an MCP tool, and you can open the arrow next to a tool name to see its arguments first. That is a good habit for the first few calls. Try these prompts, from small to useful.
Check that Clonylab is connected and list five UK female voices.Uses connection_status and list_voices.
Read the comments at the top of src/server.ts and write a 30-second narration script from them. Make it in a calm US male voice and save it as docs/audio/server.mp3.A code-comment-to-narration prompt. Uses generate_speech, get_job and get_audio.
Turn the unreleased section of CHANGELOG.md into a voice-over with a short pause between items.Adds [pause 1s] tags between the lines.
Make the same narration again in a UK voice and keep both files.Each voice-over is saved in your History, so nothing is replaced.
Keep the voice the same across a project. Say it once in your first request, such as “use the calm US male voice for everything in this repository,” and Cursor will carry it through the chat. A consistent voice makes a set of clips feel like one product.
While the job runs, the agent can keep working on other steps. When the job is done, it saves the MP3 with a download command and tells you where the file is.
06Control what Cursor can do
Cursor lets you decide how much the agent can do alone. Approvals are on by default, so a new tool call waits for you. Cursor’s Run Modes apply to MCP tools in the same way as to terminal commands. If you allow an MCP tool to run without asking, the agent can call it any time. For Clonylab, that means it can start voice-overs without a prompt.
Four Clonylab tools change something: generate_speech, cancel_job, delete_history and set_studio_settings. We suggest letting the read-only tools run freely and keeping approval on for delete_history, which removes voice-overs from your History for good.
You can also switch Clonylab off in Cursor without deleting it. Disabled servers do not load and do not show up in chat. That is handy when you do not want the agent to see voice tools during a coding session.
07Speed, pitch, pause and volume
The agent can pass four voice settings with each call. Each has a limit, and the Studio uses the same ones. Ask in plain words, such as “a little slower” or “a touch louder,” and the agent turns that into a number inside the range.
08If something goes wrong
| What you see | Likely cause | What to do |
|---|---|---|
| The server is red or shows no tools | A JSON error, or the file is in the wrong place | Check the commas and that the file is mcp.json inside the .cursor folder |
| 401 or unauthorized | The token was deleted or mistyped | Create a new token and update the file |
| The variable is empty | Cursor was started before the variable existed | Set the variable, then restart Cursor |
| The agent says no browser tab is connected | Clonylab is closed or the switch is off | Open Clonylab and switch on “Allow AI tools to use this browser” |
| The server does not show in chat | It is toggled off in the MCP list | Turn the toggle on |
We took the file locations, the headers format and the approval behaviour from Cursor’s documentation on 1 November 2026, and the Clonylab block from our own Connector screen. We have not run every Cursor version. Menu names move around, so look for “MCP” if a label differs.
09Limits, and when to use the Studio
| Topic | What to know |
|---|---|
| Plan | Pro or Team |
| Language | English only, with US and UK voices |
| One request | Up to 10,000 characters per generate_speech call |
| Browser | The Clonylab tab must stay open |
| Cloned voices | The agent can use your clones, not create them. See voice clone MCP |
| Download links | An MP3 link works for 30 minutes |
| Studio by hand | Cursor agent | |
|---|---|---|
| Best for | One clip you tune by ear | Narration that comes from your code or docs |
| Writes the script for you | No | Yes |
| Saves the file in your project | No | Yes |
| Needs the tab open | You are in it | Yes |
Want a single clip with full control? The Studio is made for that. For repeated work, such as a voice-over for every release, the editor route saves a lot of clicks. See also our guides for Claude Code and Windsurf.
10Questions and answers
How do I add an MCP server to Cursor?
Open Cursor’s MCP settings or create ~/.cursor/mcp.json, and add an entry under mcpServers with the server’s url and any headers. For Clonylab the url is https://clonylab.com/mcp and the header carries your token.
Where does Cursor keep mcp.json?
In ~/.cursor/mcp.json for tools you want in every project, or in .cursor/mcp.json inside a project for that project only.
Can I keep the token out of the file?
Yes. Cursor’s documentation says url and headers support config interpolation, so you can write Bearer ${env:CLONYLAB_TOKEN} and set the variable in your shell.
Does Cursor ask before it makes a voice-over?
By default Cursor asks for approval before it uses an MCP tool. You can open the arrow next to the tool name to see its arguments first.
Do I have to keep Clonylab open?
Yes. The voice-over is made in your open Clonylab browser tab on your own device. Keep the tab open and the browser switch on.
Is it free?
The free trial lets you try the Studio and cloning. The AI connection that Cursor uses is part of the Pro and Team plans.
Ready to let your AI make the voice-overs?
Start free with the Studio and cloning, then add Pro when you want the AI connection. English only, no card to start.
Keep reading
Sources and further reading
- Model Context Protocol in Cursor (Cursor docs) · Where mcp.json lives, the url and headers format, interpolation and tool approval.
- Model Context Protocol: introduction · The official explanation of MCP and what it is for.
- Model Context Protocol specification · The rules that AI apps and servers follow, including the HTTP transport.
- Model Context Protocol (Wikipedia) · A neutral overview of how MCP began and how it is used.
Last updated . The screenshots come from the Clonylab Connector screen, with the address and the token replaced by the real address and a placeholder. App and tool settings change often: if a step does not match your version, trust the Connector screen in your account.